How a Starlight Headliner
Is Installed
What looks like a few twinkling lights in your ceiling is actually one of the most labor-intensive interior installs in the auto world. This is what really happens between dropping your car off and driving home under your own private night sky — full headliner removal, custom fabric work, fiber-optic drilling, LED engine wiring, and full reassembly, usually across two full shop days for a clean build.
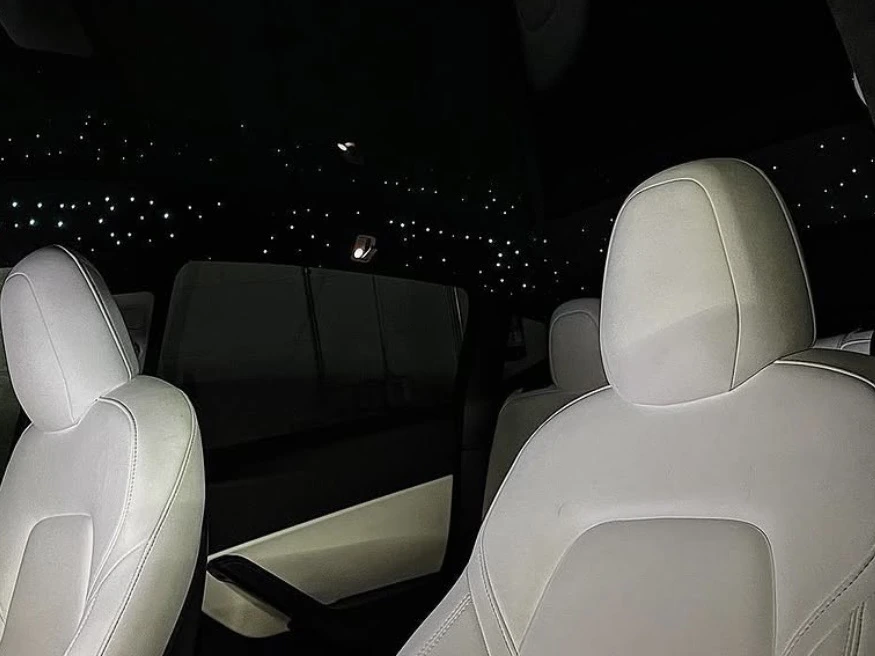
Step 1 — Star Map Design
Before a single tool comes out, the star map gets locked. Most clients sit down with us and pick one of three layouts: a random scatter (the classic Rolls-Royce look), a real constellation (Orion, Big Dipper, or your zodiac sign over the driver), or a custom shooting-star route across the cabin. Then we set density: 500 stars is our baseline, 800 is the premium spec most builds land on, and 1,200 plus is the dense luxury field you see in factory Bentleys. We also map exactly where the shooting-star module will travel and where the LED engine will live, A-pillar cavity or trunk wall. None of this is improvised once we start drilling.
Step 2 — Headliner Removal (The Part Most Shops Skip)
This is the part most shops quietly skip, and it is the difference between a clean job and a ruined headliner. To do a starlight headliner installation Los Angeles owners can keep for the life of the car, the headliner board has to come out of the vehicle in one piece. That means pulling sun visors, both grab handles, A-pillars, B-pillars, C-pillars, dome lights, and, if the car has one, the full sunroof trim ring. Sunroof cars add 30 to 60 minutes of labor and real risk, because the headliner has to clear the moonroof opening without flexing or cracking the board. Once the board is on the bench, we peel the OEM fabric off carefully and preserve the original foam backing. Any shop that drills fiber-optic holes with the headliner still bolted to the roof is doing what the industry calls a stab-in install — fast, cheap, and almost guaranteed to leave loose threads, hot spots, and uneven star placement. We do not work that way.
Step 3 — Alcantara / Suede Wrapping (The Secret)
Here is the upgrade most aftermarket installs leave on the table. Ideally the headliner board is rewrapped in genuine Alcantara or suede before any fiber optics go in. The same fiber and the same LED engine look completely different against deep, dark suede versus stock cloth — stars pop harder, contrast is dramatically richer, and the ceiling actually feels like a night sky instead of a lit-up gray panel. This is exactly why factory Rolls-Royce starlight headliners come in dark suede from the day they leave Goodwood. We offer custom colors: Bentley black, midnight navy, Bordeaux red, charcoal grey, and a few off-menu options on request. The fabric is glued with a high-temp contact adhesive and heat-pressed over the contoured board so it lays tight around every curve, with no wrinkles around the dome light cutouts or sunroof opening.
Step 4 — Per-Star Fiber Optic Drilling
Now the constellation map gets transferred onto the back of the headliner board, and the per-star drilling begins. Each star is a single, separate fiber. A standard 500-star install means 500 individual micro-holes drilled by hand, dot by dot, following the layout we agreed on in step 1. Denser custom layouts push that number past 1,000. We work with three fiber gauges so the ceiling has real visual depth: the largest fibers become lead stars that pull the eye, mid-gauge fibers fill the main field, and the thinnest fibers create the background dust that makes a real sky read as a sky and not a polka-dot pattern. If you spec a shooting-star module, that gets its own separate channel of larger-diameter fibers laid in a curved path across the headliner.
Step 5 — LED Engine and Wiring Harness
With every fiber seated, all of them get bundled at the back of the board and connected to the LED engine. Engine placement is car-specific: behind the A-pillar for tight cabins, in the trunk wall or rear quarter for SUVs and sedans where we can keep the run clean and short. Then the wiring harness routes through factory channels — the same paths the OEM headliner harness already uses, not zip-tied to random brackets and definitely not draped across the airbag deployment line. We tap into a clean 12V source, either ignition-switched or accessory-line, depending on what the customer wants (most pick accessory so the stars run with the radio without the engine on). The wiring also includes the brightness dimmer, the shooting-star controller, and the remote receiver, all routed to a discreet but reachable spot.
Step 6 — Reinstall and Quality Control
The headliner board goes back into the car, then everything we removed gets reinstalled in reverse order: pillar trims, sunroof ring, dome lights, grab handles, sun visors, all clipped back to factory torque. Then QC. Every single star has to light up — we walk the ceiling fiber by fiber under shop light and in the dark. The dimmer has to scrub cleanly from full off to full bright with no stepping. The shooting-star module has to fire on command and complete its path across the cabin. We close all the doors and drive the car around the block listening for rattles from any trim piece we touched. Then the customer comes in for a live demo before the keys go back in their hand.
Why Most Shops Will Not Do It
A real fiber optic headliner install runs 8 to 12 hours of labor minimum, sometimes two full shop days on sunroof cars or dense 1,000-plus star builds. There is real liability in the headliner R&R itself, real electrical complexity in the wiring, and zero margin for sloppy drilling. That is why most shops you find online actually sell DIY kits and ship them to your door with no install. Hussle Customz is one of the few places in Los Angeles that does the full pro install end-to-end on any car make.
Spec Your Build
If you want to see exactly what this process produces on a real car, see the Tesla Model Y starlight build we documented, or read about the Rolls-Royce starlight headliner heritage that started the whole category. When you are ready to spec your own, our professional starlight install service page walks through fiber counts, shooting-star options, and Alcantara color choices, and our cost guide breaks down how much it actually costs in LA for your specific vehicle. You can also read about the kit vs professional install math if you are comparing DIY against a real install.
Get a vehicle-specific quote.
Call (424) 207-4435 or text photos of your car. Shop: 7647 Hayvenhurst Ave Unit 35, Van Nuys, CA — by appointment only.